Page 1 of 3 1 2 3 LastLast
Results 1 to 10 of 29

Thread: Mr A's painting D.I.Y.

  1. #1
    Senior Member Mr Awsome's Avatar
    Join Date
    Mar 2009
    Name
    Dave
    State
    SA
    Location
    Plympton
    Country
    Australia
    Posts
    610

    Default Mr A's painting D.I.Y.

    well did some work on the car today with a tiny D.I.Y. to go with it.

    step 1 strip the door

    step 2 blow the door off and clean it.


    step3 buzz down the edges and any imperfections in the paint.


    step 4 rub it over with a scotch bright.


    step 5 blow it off and clean it (thinners or wax & grease)


    step 6 mask it up.
    ]

    step 7 tack rag it.


    step 8 spray some etch on it.


    step 9 put a coat of primer on it.


    step 10 paint it.


    step 11 marvel in the awsomness!!!!!!!!


    this was what i used to paint it just missing the tack rag and scotch bright.

  2. #2
    Senior Member Mr Awsome's Avatar
    Join Date
    Mar 2009
    Name
    Dave
    State
    SA
    Location
    Plympton
    Country
    Australia
    Posts
    610

    Default

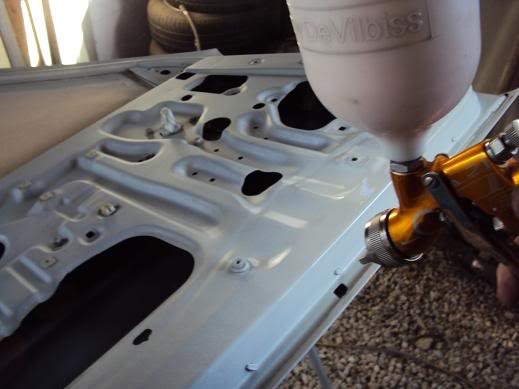
    all painting done with this 2.5hp 50lt piece of shit compressor. Some tools you will most probably use

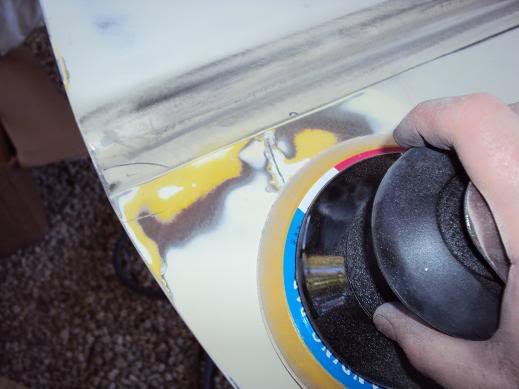
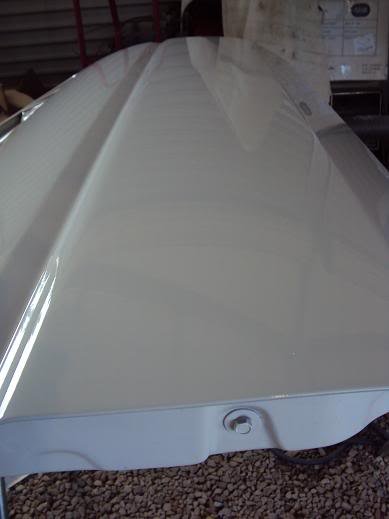
    mark out the dents. the quickly run over the panel with 240 with a interface pad. apply some guide coat.

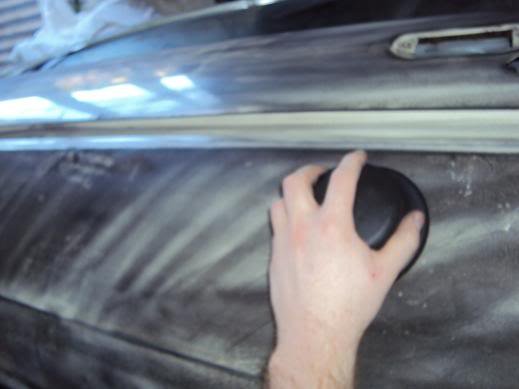
    rub with some 120 using a speed file. rub to the left nice big even strokes then to the right. you should see a crisscross pattern appear

  3. #3
    Senior Member Mr Awsome's Avatar
    Join Date
    Mar 2009
    Name
    Dave
    State
    SA
    Location
    Plympton
    Country
    Australia
    Posts
    610

    Default

    keep rubbing till all the black is gone. if you have some ripples, you may need to apply another coat. if you have some chips like i did, you can buzz them out a bit then board file them flat.

    i had a couple of small dents. grab a bit of 120 and scuff the dent. wipe over with thinners. apply body filler. when dry apply guide coat. board file till all the black is gone. have a feel if needed guide coat again and rub some more.


    buzz over the panel with 400. making sure you get the edges to bare metal.

    blow if off and wipe down with water. wipe over with wax&grease remover.
    Last edited by Mr Awsome; 3rd February 2010 at 11:54 PM.

  4. #4
    Senior Member Mr Awsome's Avatar
    Join Date
    Mar 2009
    Name
    Dave
    State
    SA
    Location
    Plympton
    Country
    Australia
    Posts
    610

    Default

    mask it all up, wax&grease it again, spray etch on it.

    2k primer with normal hardener and normal thinners mixed 4.1.1, stan s4000 1.8 HPLV works a fucking treat on such a shit compressor. now sparying primer first with a half coat. let it dry for ruffly 3-5min. then apple a full coat wait 5mins, then another one wait 5mins and one more for luck. place in sun for a few hours.


  5. #5
    Senior Member Mr Awsome's Avatar
    Join Date
    Mar 2009
    Name
    Dave
    State
    SA
    Location
    Plympton
    Country
    Australia
    Posts
    610

    Default

    once dry apply guide coat then block with 240. then buzz with 400 with interface pad. blow off and wet rub with 800, blow off and wax&grease.


    mask up and wax&grease again. blow off and tack rag. apply etch if needed. then you paint it. now you start with your edges first. then youput down a half coat and let it dry3-5mins. then apply a full coat, followed by another full coat after 3-5mins of drying time. then make sure you pull off the paper.


    BANG! AWSOMENESS BITCHES!!!!!!

  6. #6
    Veteran hao.'s Avatar
    Join Date
    Dec 2008
    Name
    Hao
    State
    QLD
    Location
    South Brisbane
    Country
    Australia
    Posts
    1,170

    Default

    Fuck yeah. Thanks for that.

  7. #7
    Senior Member Mr Awsome's Avatar
    Join Date
    Mar 2009
    Name
    Dave
    State
    SA
    Location
    Plympton
    Country
    Australia
    Posts
    610

    Default

    no probs

  8. #8
    Ok
    Join Date
    Nov 2008
    Name
    Seamus
    State
    QLD
    Location
    Milton
    Country
    Australia
    Posts
    1,860

    Default

    great gun, and awesome little writeup. props

  9. #9
    Veteran blair's Avatar
    Join Date
    Dec 2008
    Name
    Blair
    State
    QLD
    Location
    SEQ
    Country
    Australia
    Posts
    3,049

    Default

    wow, i definitely missed a few steps when i painted mine! haha.

    nice job man

  10. #10
    Veteran R&D Mechanical's Avatar
    Join Date
    Dec 2008
    Name
    Davey & Riki-lee
    State
    South Australia
    Location
    Seaford SA
    Country
    Australia
    Posts
    3,003

    Default

    nice write up mate! looks tops, just needs a buff
    R&D Mechanical, Seaford SA - please visit www.rdmechanicalshop.com
    Our introduction - Click here

Page 1 of 3 1 2 3 LastLast

Similar Threads

  1. Project MR Busa
    By DX20VT in forum Other Toyotas
    Replies: 43
    Last Post: 30th December 2011, 08:47 AM
  2. MR A's...Track car!
    By Mr Awsome in forum AE86 Owners Forums
    Replies: 132
    Last Post: 9th December 2011, 03:44 PM
  3. Mr Fujiwaras Ae86
    By Mr Fujiwara in forum AE86 Owners Forums
    Replies: 60
    Last Post: 13th August 2009, 07:53 PM
  4. arigatou Mr Roboto
    By eastcoastdrifter in forum Toyotas in the Media
    Replies: 0
    Last Post: 29th October 2006, 09:23 PM
  5. MR - 20V --- (Hayden) --- ???
    By wide s13 in forum General Topics (No Technical Questions)
    Replies: 26
    Last Post: 26th May 2005, 02:31 PM

Posting Permissions

  • You may not post new threads
  • You may not post replies
  • You may not post attachments
  • You may not edit your posts
  •