


I had some alternator/battery problems a while ago and managed to correctly diagnose and fix the problem, which was the battery wasn't charging, because the brushes in the alternator had worn to the point where they weren't contacting the slip rings on the shaft. if your battery isn't charging and the voltage with the engine running is the same or lower than when the engine is not running then this cause should be considered.
Usually i'd just replace the alternator but RT142 coronas aren't that common and i didn't want to pay 200 odd bucks for a reco'd alternator.
anyway after looking at an ebay store that sold brushes and brush holders and had a brief explanation on how to replace them I pulled down my alternator and dodgied it up by extending the brush wires so the brushes were contacting the slip rings, which kept the alt working for the last month until i got the chance to buy some brushes.
This is how i replaced them just now, pretty easy job, the guts of an alternator are pretty basic.
First take the alternator and put it on a nice clean sheet of cardboard on the ground
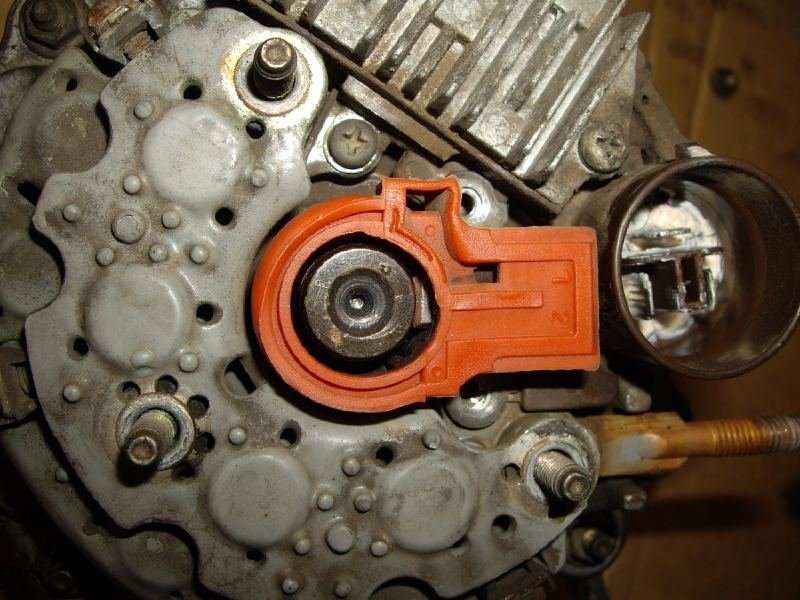
then undo the cover plate, you will need to undo the nut on the battery terminal and remove the insulator to get it off, undo the two screws either side of the brush holder, which has the orange rubber thing on/attached to it.
Remove the brush holder, have a look at the slip rings, dunno how much gouge there needs to be to worry about replacing them and i don't know how to replace/service them, so i didn't worry about it.
these are the worn brushes in the holder
Here is where the brush pig tails are soldered to the terminals, desolder these and remove the brushes. if you don't have new springs, don't lose the springs when they fly out. If the brushes haven't been replaced before the solder will be covered in paint of some kind, if this is the case use a wire brush or something to get down to the solder if it is giving trouble.
when you remove the brushes you want two clear holes like so so you can get the new pigtails through to re-solder them
comparison of the old brush and spring to the new brush. I extended the cable of the old brush to keep my car running, which is why it looks like it does.
Feed the new brush cables through the holes and slip the springs in the holder
compress the springs until the brushes don't stick out on too funny an angle, then wrap the pigtails around the terminal tabs so the springs don't push the brushes back out of the holder
now solder the pigtails to the metal of the brush holder, your solder joins should look nice and shiny, not dull and shit like this. I think there was contamination from the last time i did this, still seems to work fine but could cause problems in the future.
now you can put the brush holder back on the alternator, I used a strip of copper like so to compress the brush springs so the brushes would slide into place easily, otherwise it would have been hard to get them back on and might have chipped the brushes.
when the brush holder is all the way on screw down the terminals and pull out the strip, instead what I did here.
put the alternator back together
Voltage with engine off
Voltage with engine on, fixed!
The voltage regulator is very easy to replace too, and looks like it would be a common part across a lot of toyotas by looking at parts and catalogs, dunno what the symptoms of a dud regulator are, apart from too high battery voltage or not charging, its easy enough to have a look and see if you have brush contact and decide if the reg is stuffed though.

Nice write up i just did this in my 4age. I bought myself a new brush box and regulator for only 70 bucks! Brush box with new brushes was only 20 bucks which is cheap and saves alot of fucking around. The slip rings are servicable i believe there pressed on and need to be machined up in a lathe. I didn't do this and had a few problems getting the new brushes to wear into the old worn out slip rings. But 6 months later and havent had a charge light in a while, Fingers crossed haha
 Posting Permissions


 Reply With Quote