


Managed install my custom king springs in the back, their a little low so I am going to fit some rubber spacers to lift it a little.
I also did do some work to my new exhuast with the help of Kev (phrostbyte), him holding the muffler in position made things increadibly easier. This time I did things even better there isn't a single burr, welding bubble, nick, pit or step in the whole system. Looking down inside it all that can be seen are lines where the pipes join and that's it, this is why I do this stuff myself. I also took to the inside edge near the exit of the stainless muffler because it had a burr and I took that right down, overkill maybe but hell I do it because I can. I took special care to make it hug the body really close and I made it so that if I took my springs and bump stops out the diff still can't hit the thing, well thats the plan anyway..
Heres a half way pic:
theres 8 peices right there and while it looks so simple it sure isn't. Anyhow I am happy with how it's turning out and how it sits in there. I had to stop because I didnt have a resonator to weld in and I needed it to continue. I will order the longest one I can because there's a suprisingly large amount of room under there for one and I will make sure that it's very close to the body because otherwise it will cop a bashing. I as for the flanges and mounts I will add them last.
I worked on changing how my spare wheel sits in my car today. Previously I thought it was stupid that the original setup had the spare wheel sitting proud of the recess that was in the car for it, so I changed my OEM spare to a space saver. These are apparently available from S13 model silvias and 180s, later models I have been told have a larger outside diameter so they arn't much good. Anyhow the one I got fitted looked like it was made for it:
today I quickly made up a thin MDF cover (8mm I think) to go over it. Heres how it ended up looking:
Now when i sit the carpet down the floor is completely level which is great. It also makes things so much better when i make a high tech light-weight subbie box.
I also plan to cover this board with something or paint it black, but I will do that when I have done more important things first so it sure as hell won't be anytime soon.
Here's another project from a while back:
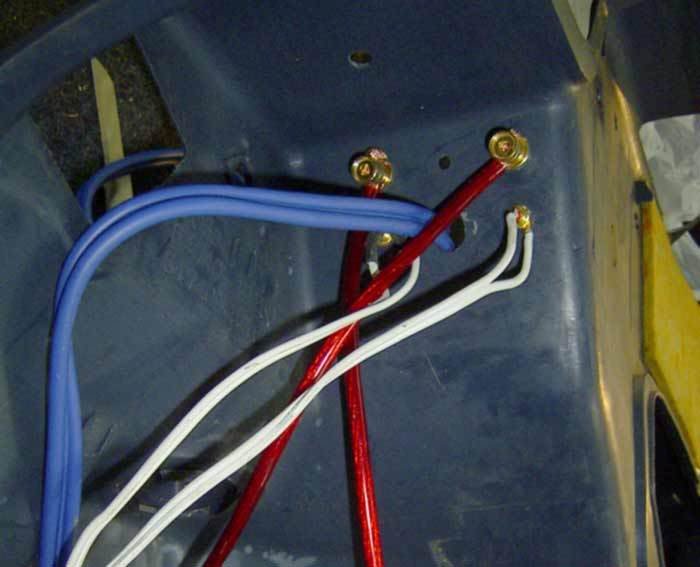
What this is is a setup to have a fully modular rear sound system. This photo was taken when I had my passenger side parcel shelf removed just before I replaced it. The theory behind this one is that I want to have rear speakers and a small subbie but I want to be able to remove them in under a minute to fit my bike in if I want to do so. So I went for this system that uses plugs for everything. The Parcel shelf will unclip physically and the wires all unplug in moments, heres what I used to do it:
These are as follows:
[Power + ].........[]........[Power - ]
[R speaker]...[cables]...[L speaker]
In my hand is the connection for the RCA inputs into my amplifier and also the remote power on for it. The fork lug on the end of the remote wire stays in the amp and when I want uplug it it's done at the red RCA plug and socket in the middle of the lead. The Sub-box has the amp screwed to it and are obviously removed together. The amp has 2 short leads also permenently wired in for power and both of those have bannana plugs attached to the end so even the power is able to be unplugged, also bannana plugs by nature allow a decent amount of current to pass through them, I chose gold plated models to help further.
heres how it looks when its pulled out from the inside:
I did however end up shortening the ground wire and it was joined to the body as close as possible. I drilled a hole though the metal seat mount support and sanded it back to have good contact.


 Reply With Quote